As a hockey player, nothing is more important than having properly tied skates. Not only will it keep you safe on the ice, but it will also give your feet the support they everything you need to know to help you perform at your best. However, even if you’ve been playing for years, it’s not always easy to remember how to tie hockey skates correctly. That’s why we have put together this step-by-step guide on how to properly tie hockey skates. With our tips and tricks, you can be sure that your lace hockey skates are tight enough for optimal performance but not too tight that they cause discomfort or injury. Read on to learn our tried and tested method!
Step 1: Lace up your skates
Before you can hit the ice, you need to make sure your skates are properly laced up. This may seem ice and are feeling like a simple task, but if done incorrectly, it can lead to serious injury. Here is a step-by-step guide on how to properly lace up your hockey skates:
- Start by threading the laces through the eyelets at the bottom of the skate.
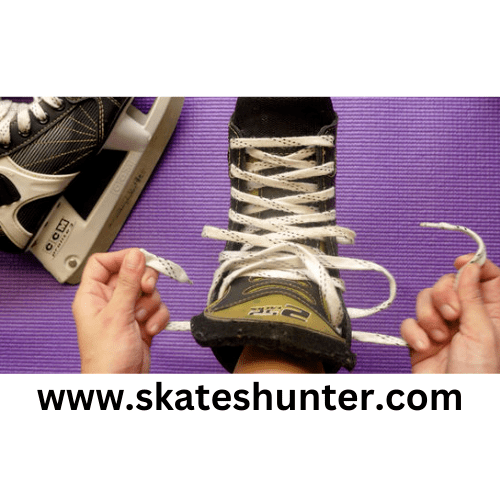
- Next, crisscross the laces over the tongue of the skate.
- Once the laces are in place over the tongue, begin tightening them by pulling from the front of the skate towards the back. Make sure not to pull too tightly, as this could damage the skate and cause discomfort.
- Continue crisscrossing the laces until you reach the top of the skate, then would tie them off in a double knot.
- Finally, tuck any excess lace into the top of the skate so it doesn’t get in the way to lace your skates while you’re skating.
Step 2: Cross the laces in the front
Before you start lacing up your hockey skates, it’s important to understand the different parts of the skate. The tongue is a key part of the skate, and it’s important to make sure that it’s not only in the right position, but also properly laced. The laces should be crisscrossed in the front of the skate in order to provide support and keep the tongue in place.
To cross the laces, start at the bottom of the skate and thread one lace over the other. Then, take the end of the lace and thread it through the hole on the side of the skate. Finally, pull both laces tight and tie them together in a knot.
Step 3: How To Tie Hockey Skates a basic knot
After you have your laces all the way tightened, it is time to tie a basic knot. Take the left lace and make a small loop or ‘bunny ear’. Then, take the right lace and make a small loop. Next, how to tie hockey skates the two loops together by placing one over the other, tucking it underneath, and pulling through the hole.
Finally, tighten the loops by pulling on both laces until the knot is close to your shoe. You have now successfully tied a basic knot in your skate laces!
Step 4: Pull the laces tight and tuck them in
To properly tie your hockey skates, you’ll need to pull the laces of hockey skates tight and tuck them in. Start by pulling the laces tight from the toe towards the top of the skate. Then, tuck the laces under the tongue of the skate so they don’t come undone.
Step 5: Finish by tying a bow
To finish, take the laces in each hand and cross them in the middle, making sure they’re even. Then, tie a basic knot by threading one lace over the other and pulling tight. Finally, make a loop with one of the laces and thread the other lace through it to create a bow. Again, make sure both loops are even before pulling tight.
The Right Way to Tie Your Hockey Skates
There are a couple of different ways that you can tie your hockey skates are too loose, but the best way is to use the “bunny ear” method. This method is simple and effective, and it will keep your skates secure throughout the game.
To tie your skates using the bunny ear method, start by threading the laces through the eyelets on one side of the skate. Then, make two loops with the laces, similar to how you would make bunny ears. Cross the loops in the middle, and then tuck them underneath the other lace. Finally, pull on the loops until they’re tight, and then tie them off in a knot.
With your hockey skates properly tied, you’ll be able to move quickly and confidently on the ice hockey skates.
Different Ways to Tie Your Hockey Skates
- How to tie hockey skates with the basic laces –Start by threading one of the skate laces through the top set of eyelets on your skate, then pull it taught. Next, take the other lace and do the same thing through the next two eyelets down. Now you’re ready to tie a basic knot – take one end of each lace in each hand, and tie them together once, then twice more to finish it off.
- How to do a cross-lace pattern on your hockey skates –This is a variation on the basic pattern that many people find provides a more secure and comfortable fit. To start, thread one lace through the top two eyelets on one side of your skate, then pull it across the front of the boot to thread through the corresponding eyelets on the other side. Repeat with the other lace, crisscrossing them in front before tying them off in a basic knot like before.
- How to use figure-eight lacing for your hockey skates –This is another variation that can provide a more customized fit. Start by threading one lace diagonally through the first two sets of eyelets on one side of your skate, then cross it over and do the same thing on the other side. Next, take the other lace and do a figure-eight pattern around both sets of laces before tying it off in a basic knot at the end.
Why It’s Important to Tie Your Hockey Skates Properly
It is very important to tie your hockey skates properly. If you do not, you can end up with a lot of problems. For one thing, if your skate laces are not tied correctly, they can come undone while you are skating. This can cause you to trip and fall, which can lead to serious injuries. Additionally, if your skate laces are not tied tight enough, your feet can slip around inside your skates, which can also lead to falls and injuries.
On the other hand, if you tie your skate laces too tight, it can cut off circulation to your feet and cause them to go numb. This is obviously not ideal either, as it can impair your ability to skate properly. Therefore, it is important to find a happy medium when tying your skate laces – not too loose and not too tight.
How to Fix Common Hockey Skate Problems
One of the most common skate problems is when the blades become dull and need to be sharpened. This can be easily fixed with a skate sharpener, which can be found at most sporting goods stores. Another common problem is when the laces come loose and need to be tightened. This can be done by simply re-tying the laces or by using lace locks, which are small devices that keep the laces tight.
Another common issue is when the skate’s boot starts to come apart from the blade. This is usually caused by either wear and tear or by not properly tying the skates. If this happens, it is important to take them to a professional to have them repaired, as it can be dangerous to continue skating on them.
Last but not least, sometimes skates just don’t fit well and need to be exchanged for a different size. This isn’t necessarily a problem with the skates themselves, but rather with the way they were purchased. If possible, it is always best to try on skates before buying them to ensure they fit properly.
Equipment Needed
In order to bow tie hockey skates properly, you will need the following equipment:
Hockey Skates
A sharp skate blade
A dull skate blade
A skate guard
Hockey laces
A hockey stick
With all of your equipment gathered, you are now ready to begin tying your skates!
The Skater’s Position
Assuming you are tying your own skates:
The first step is to sit on the floor with your legs out in front of you. Your skate should be placed next to the put your foot it will be going on with the blade pointing away from you. You will then want to take hold of the ankle part of the skate and pull it up towards your shin so that the boot is tight against your leg.
The next step is to put your weight onto the foot in the skate that is inside the skate and bring your other knee up so that you are resting on both shins. You should now be in a position where you can reach both laces and tie them together in a bow.
Tying the Laces
Assuming you are right-handed, hold the skate in your left hand with the blade pointing downwards. Take the lace in your right hand and thread it through the eyelet at the front of the skate and pull it tight. Then, take the lace in your left hand and thread it through the next eyelet on the left side of the skate. Next, take the lace in your right hand and thread it through the eyelet on the right side of the skate that is direct across from the one you just did on the left side. Now pull both laces tight.
Double Knotting the Laces
There are two ways to double knot your laces: the regular way and the loop method. The regular way is to simply tie a second knot after you’ve tied the first one. The loop method is to make a loop with one of the laces, thread the other lace through the loop, and then pull tight. Either way works, so it’s up to you which one you prefer.
To double knot your laces using the regular method, start by tying a regular knot in your laces. Then, take the end of one of the laces and thread it through the hole created by the first knot. Pull tight and repeat with the other lace.
To double-knot your laces using the loop method, start by making a loop in one of the laces. Take the end of the other lace and thread it through the loop. Pull tight and repeat with the other lace.
Tying the Top Knot
Here’s how to properly tie a hockey skate:
- Start by threading the laces through the eyelets on the skate. Start at the bottom and work your way up.
- Once the laces are through all the eyelets, tie them together in a double knot at the top of the skate.
- Make sure the knot is tight against the tongue of the skate. This will help keep it in place and prevent it from coming undone during gameplay.
- Repeat on the other skate and you’re ready to hit the ice skates.
The Final Step: The Bow
The final step in tying your hockey skates is the bow. This is what will keep your laces tight and secure, so it’s important to do it correctly.
To tie a proper bow, start by threading the lace under the other lace (the one that’s already been tied in a loop). Then, pull the lace through the loop, and tighten it by pulling on both ends of the lace. Finally, tie a knot at the end of the lace to keep it from coming undone.
That’s it! You’re now ready to hit the rink and show off your newly learned skills.
Conclusion
Hockey skates are an important piece of equipment that must be tied properly in order to get the most out of them. With this step-by-step guide, you should now have a better understanding of how to tie hockey skates correctly and why it is so important to do so. While there might be variations depending on individual preference, following these steps will help ensure that your skate lacing provides adequate support and comfort for your feet while playing hockey. Now you can enjoy playing hockey with confidence knowing that your skates are tightly tied!
FAQs
Should roller skates be tied tight?
No, roller skates should not be tied tight. Tying the skates too tightly can cause them to become unstable and can lead to injuries. Skaters should instead use a light but consistent pressure to ensure a smooth and safe ride.